Tuesday, July 29, 2008

Cabin interior complete for now


Cabin ceiling and deck was scrubbed with artificial steel wool pads and TSP, Awlprepped, sanded with random orbital 60 grit, primed with Awlgrip 545 primer, then lightly scuffed. The ceiling was painted with BEHR exterior enamel(alpine snow white). I rolled it. The cabin floor was painted with AWLGRIP light grey topside paint, flattened and mixed with course griptex additive for a non-skid surface. I also cleaned /primed and nonskid painted the teak cover to the bilge. I didn't like the slimy feeling under foot when the wood was wet. Mahogany trim pieces were installed in the companionway with 3M 4000UV sealant. No need for screws, this shit is tenacious. I will eventually repaint the original yellow FRP surfaces with left over awlgrip, I just don't feel like it right now. Priority is on remounting hardware.

Monday, July 21, 2008

Thursday, July 17, 2008

Color


I like this color scheme , and it's more practical for the weather here.

Fairing Inside


I ground down the fiberglassed instrument holes from the inside. I 50 grit sanded (orbital) all of my holes and depressions from the fender washers securing my old cabintop hardware. I alcohol wiped everything clean. Mixed up some epoxy, added silica for thickener ( can't let it run or sag from above), added microballons and spread the mixture onto the depressions. It's important to spread the mixture out onto a paint tray or something similar in order to extend your working time with epoxy. If you skip this step and leave it in a container it will kick off and harden 5 times as fast( with a fast hardener). I then scraped the remaining mixture in the pan with a popsicle stick and spot filled alot of small holes and imperfections. It will take three or more fairing evolutions ( sand, clean, epoxy) to get the smoothness I want. My last sanding will be with a small longboard by hand.

Thursday, July 10, 2008

Old interior


Here's some before pics of what I'm working with. I know I'm going to grind, fill, fair, prime and paint the ceiling and instrument bulkhead. I'm also quite certain I'm going to paint and nonskid the cabin floor with leftover light gray awlgrip. I just don't know about removing all of the interior woodwork. Although I'm sure it will come to that.

Wednesday, July 9, 2008

Sandbar fourth of july


I put a block on my chainplate and one on my rear cleat and flew my #3 to the sandbar (broad reach), motored back.

My companionway trim smells of rich mahogany

I had to make new trim due to 3M 5200 holding my old teak ones on. Needless to say they came off in pieces. So, I went with mahogany, stained ebony, and 4 coats of marine spar satin lacquer. I can't remember the brand names. The bottom trim is teak refinished with the same products. I'm reduing the interior next so the little interior trim pieces aren't on yet.

Thursday, July 3, 2008

AWLGRIP Non Skid


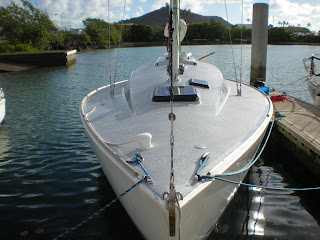
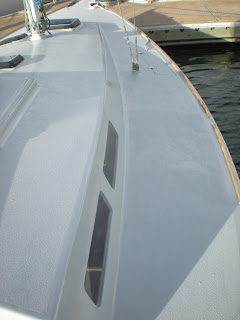
I finally finished up the painting process. It took several days to complete. 3 coats of 545 primer, sanded 220, awlprepped + alcohol wiped. 2 to 3 coats of reduced awlgrip light gray topcoat paint. Ready for the nonskid. I mean how hard can it be? I spent countless hours mixing and thickening epoxy for the repairs. Hours mixing the fairing compound. Hours mixing and brushing/rolling primer and paint. Non skid upon internet research, looks to be an easy process but, If you want it to be spreadable on the deck after you apply it (good thing), follow the awlgrip instructions and don't mix it thick. In fact 3/4 of a quart of griptex mixed into two+ quarts of paint mixture is plenty. Bottom line, I scraped and sanded the nonskid off the bow section twice. Lesson learned, also keep a wet edge with the nonskid, and if you want a uniform color/glare in the sun, mix enough to do the whole deck at once.


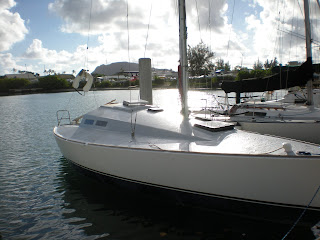
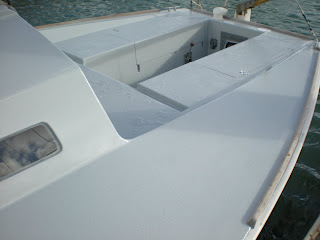
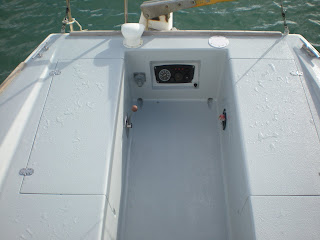
That being said, the paint/nonskid is done. The tape is removed. The hatches are bedded and fastened (new lexan $212). The chocks and cleats and cowl vents are properly bedded and fatened with new 316 stainless fasteners. The hinges for the cockpit compartment lids, and anchor locker are new 316 stainless and properly installed. My stained and varnished mahogany trim for the companionway and hatch are finished and about to be installed this evening. My wife says she's going to clean the cabin. I still have to clean up paint drips on the hull, clean up the transom, and I want to put a bead of 3m 4000uv around the inside of the toerails to seal the paint edge.


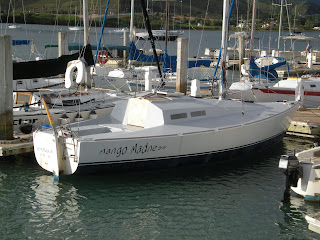
Overall the boat looks good, but until I have my hardware reinstalled and new lifelines/ color, the boat topsides looks kind of plain.