Wednesday, June 25, 2008

First top coat (shiny areas)


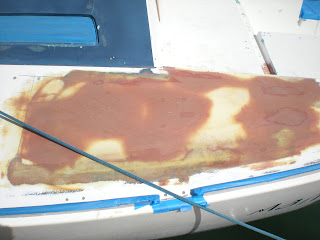
I've sanded the primer with 220 grit random orbital. I alcohol wiped everything with the two rag method. I mixed up some awlgrip light gray paint with brush converter. I let it kick for 30 minutes, then added about 35 percent reducer. I started at the bow along the toe rails and moved quickly with a 3" foam roller and a 2" china bristle brush. I made it around the toe rail quickly and then painted around the hatches and mast. I then moved to the vertical surface of the cabin top, around the seahood and down the other side of the cabin top (portlights). I finished up with the cockpit area, with alot of painting in there. I reduced the paint that was sitting as I moved along. I mixed about twice the amount of paint that I needed, and I was putting it on slightly heavy. I will sand everything with 400 grit tonight, prep, then put on another coat on the same areas. Hopefully I will do a better job. Its hard to tell from the pics, because the paint looks good from 10 feet, but I'm not happy with the results. Also the drops are rain not paint defects. I also skipped the flattening agent additive for the first coat, so its really bright and shiny. I need to fill some holes with thickened epoxy over lunch, I replaced my rear cleats with bigger ones and the holes won't line up.

Monday, June 23, 2008

Primed


Awl Grip 545 gray primer is on. 3 coats. Used about a half gallon for everything. I still need another coat on the seahood and lids. I learned alot about the roll and tip process during this adventure. I understand the "add more reducer as the paint sits" tip. I also should've taken the advise of other online painters and not used my $25 a piece badger hair brushes for the primer. Now I need to buy two more for the topcoat. Just to clarify, the dark gray paint is actually primer, the color I'm going with for topcoat and non-skid is light gray.

Monday, June 16, 2008

Almost


I've sanded everything, cleared a clogged anchor locker, wire brushed and scrubed the deck and toerails, and finally taped evreything off. The tape will last throughout the prime/paint/nonskid process so I took my time doing it. I've found a couple of areas I can fill but I'm going to roll my first coat of primer on first. I feel like I've been looking at the same level of acomplishment for a long time. The color/contrast change will do me good. It's hard to not rush jobs when you are working by yourself and are this close to completion. Wish me luck.

Monday, June 9, 2008

Chainplates O.K.


I've been busy with several small areas of the deck for the last few weeks. I've had people visit and made a couple trips to the sandbar in "repairs". The time is at hand. Everything is faired to my standards as far as I can tell, before priming, and I've just cut away some balsa from the chainplate area whilst removing and inspecting the chainplates. I don't think they've ever been removed and they were'nt sealed very well. The protective cover looks like it has been removed but the owner resealed it with silicone. The port side was dry, the starboard side was wet but not destroyed. I routed out some wood, acetoned the site, and filled the hole with thickened epoxy. I don't know if I'm going to pull the plates after the epoxy cures. I might just leave them glued to the sides. I waxed the chainplates so the epoxy shouldn't stick to them. I'm going to sand the epoxy flush tonight, and start to sand the entire hull from bow to stern. Only thing left to do is sand, degrease again, tape the toe rails, and start the priming/painting job.